Professional Basketball Hoop Installation Guide: How Homeowners Choose the Right System
When you decide to add a basketball hoop to your Maryland, DC, or Northern Virginia home, you're making an investment that goes far beyond weekend fun. You're creating a space where your family can stay active, build skills, and make lasting memories. But choosing the right basketball system and ensuring proper installation can mean the difference between years of safe enjoyment and costly repairs, safety hazards, or even liability issues.
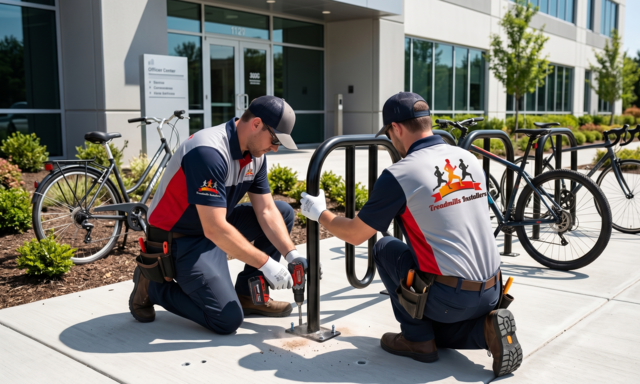
Professional installers serving the Mid-Atlantic region see the same mistakes repeatedly. Homeowners purchase systems that don't match their space, attempt DIY installations without proper equipment, or overlook critical safety requirements. The result? Unstable hoops that pose injury risks, voided warranties, and installation failures that require expensive corrections.
This guide walks you through exactly what professionals evaluate before recommending and installing a basketball system, so you can make informed decisions that protect your investment and your family's safety.
Understanding the Three Main Basketball System Types
Before discussing installation requirements, you need to understand which system type fits your property, budget, and long-term plans.
Portable Basketball Systems
Portable systems consist of a backboard, adjustable pole, rim, and wheeled base that you fill with water or sand for stability. These systems appeal to homeowners who want flexibility or aren't ready to commit to permanent installation.
When portable systems make sense:
Rental properties where permanent modifications aren't allowed. Families who may relocate within a few years. Homeowners who want to reposition the hoop for different activities or seasonal storage. Properties with limited suitable locations for permanent installation.
Important limitations professionals warn about:
Portable systems inherently lack the stability of in-ground installations. Even when properly weighted, they can tip during aggressive play, strong winds, or if children attempt to hang on the rim. The base takes up significant driveway space and can be an obstacle for parking or other activities. Water-filled bases must be drained before freezing temperatures to prevent cracking. Sand-filled bases become extremely heavy and difficult to move once filled.
Professional installers stress that portable systems work best for younger players and casual use. If you have teenagers or adults who play aggressively, or if you want a system that truly mimics gym-quality play, portable units will consistently disappoint.
In-Ground Basketball Systems
In-ground systems represent the gold standard for residential basketball installations. The pole is anchored in concrete below ground level, creating exceptional stability and a professional playing experience.
Why professionals recommend in-ground systems:
These installations provide superior stability that remains solid during dunking, aggressive rebounding, and any level of play intensity. They take up less space than portable units since there's no base extending onto your playing area. In-ground systems typically come with better construction quality, thicker poles, and more durable backboards. These installations increase property value when done correctly and maintained properly.
The commitment you're making:
In-ground installation requires excavation, typically digging a hole 48 inches deep and 16 to 24 inches in diameter depending on your system. You'll need 12 to 16 bags of concrete mix to properly anchor the system. Installation takes two to three days when you account for digging, setting the anchor, concrete curing time, and final assembly. Once installed, the system is permanent unless you invest in an anchor kit system that allows future relocation.
For Maryland and Northern Virginia properties, professionals must also consider frost line depth requirements. Improper depth can result in frost heave, where freezing and thawing ground movement shifts your pole over time, creating dangerous lean angles.
Wall-Mounted Basketball Systems
Wall-mounted or roof-mounted systems attach directly to existing structures using heavy-duty mounting brackets. These work well for properties with limited ground space but require careful structural evaluation.
When wall-mounted systems are appropriate:
Garages or buildings with structurally sound walls capable of supporting dynamic loads. Properties where ground installation isn't feasible due to underground utilities or poor soil conditions. Facilities that need to maximize ground-level space for multiple activities.
Critical installation requirements:
Professional installers must verify that your wall or roof structure can handle the forces generated during play. Standard wood-framed residential walls typically cannot support wall-mounted basketball systems without significant reinforcement. Brick or concrete block walls work better but still require proper assessment. Mounting hardware must penetrate deep into studs or structural members, not just surface materials. Extension brackets are essential to provide clearance between the backboard and the wall for safe play.
A recalled wall-mounted basketball system in recent years resulted in a fatality when the goal detached from the wall during use. This tragic incident underscores why professional evaluation and installation matter critically for wall-mounted systems. Improper installation doesn't just risk property damage but can lead to catastrophic injuries or death.
Professional Assessment: What Installers Evaluate Before Recommending a System
Experienced basketball hoop installers serving Maryland, DC, Delaware, Pennsylvania, and Northern Virginia follow a systematic evaluation process before recommending specific systems. This assessment protects you from purchasing equipment that won't work for your property or won't meet your long-term needs.
Property Space and Playing Area Analysis
Your available space determines more than just whether a hoop will fit. It affects player safety, system performance, and long-term satisfaction.
Driveway and court dimensions: Professional installers measure your available playing area to determine appropriate backboard sizes and pole placement. A single car driveway typically accommodates 44 to 54 inch backboards adequately. Two car driveways work well with 60 inch backboards, providing better shot options and more authentic play. Three car driveways or dedicated court spaces can accommodate regulation 72 inch backboards, which deliver the most realistic playing experience.
Installers also evaluate the distance from the pole location to surrounding obstacles. You need adequate clearance behind the baseline and on both sides to prevent players from running into vehicles, walls, landscaping, or other hazards during normal play.
Surface evaluation: The playing surface condition affects both safety and installation feasibility. Cracked, uneven, or deteriorating asphalt creates tripping hazards and may indicate underlying soil instability that could affect in-ground installations. Proper drainage matters because standing water creates slip hazards and can accelerate concrete anchor deterioration. Surface slope should not exceed two percent, or players will struggle with ball control and consistent shooting.
Underground utility clearance: Before any digging occurs, professional installers require utility locates to identify buried power lines, gas lines, water mains, sewer lines, and communication cables. Maryland, DC, and Virginia all use the Miss Utility service for underground utility marking. Failing to obtain utility locates before digging isn't just dangerous but also illegal and can result in substantial fines, repair costs, and liability for service disruptions.
Even after utility marking, experienced installers probe carefully during excavation. Private utilities like sprinkler systems, low-voltage landscape lighting, and invisible pet fences often don't appear on utility locates but can still create installation complications.
Soil and Foundation Conditions
The ground beneath your proposed installation site determines whether an in-ground system will remain stable for years or begin tilting within months.
Soil type assessment: Rocky, dense soil provides excellent anchor stability and requires more effort to excavate but delivers superior long-term performance. Clay soils expand and contract with moisture changes, potentially affecting anchor stability over time. Sandy or loose soils may require larger holes and more concrete to achieve adequate stability. Areas with recent fill or disturbed soil may not provide sufficient bearing capacity without additional preparation.
Frost line considerations: The frost line depth varies across the Mid-Atlantic region. In Maryland, the frost line ranges from 30 to 36 inches deep depending on your specific location. Northern Virginia sees similar depths, while higher elevation areas may have deeper frost lines. Pennsylvania locations can have frost lines extending to 42 inches or deeper in northern counties.
Professional installers know that basketball hoop anchors must extend below the frost line to prevent frost heave. When ground freezes, it expands and can push shallow anchors upward. As the ground thaws and refreezes through winter cycles, this movement creates progressive lean in your pole that cannot be corrected without complete reinstallation.
System Quality and Component Evaluation
Not all basketball systems are created equal, even at similar price points. Professional installers guide homeowners toward systems with components that will last and perform as expected.
Backboard materials and construction: Regulation tempered glass backboards deliver the most authentic ball response and are used in competitive play from high school through professional levels. These 72 inch backboards provide true to gym performance but represent the highest price point. Acrylic backboards offer good ball response at a more accessible price point and work well for serious recreational play. Higher grade acrylic provides better clarity and more consistent rebound characteristics. Polycarbonate backboards provide excellent durability and impact resistance for younger players and casual use. These boards won't crack like glass or acrylic but offer less authentic ball response.
Pole construction and sizing: Professional grade systems use a single-piece pole design that eliminates weak points present in two piece or three-piece poles. Pole diameter and wall thickness directly affect stability and vibration dampening. Quality systems feature 5 inch by 5 inch square poles with thick steel walls for 60 inch backboards, and 6 inch by 6 inch or 7 inch by 7 inch poles for 72 inch glass backboards.
Adjustment mechanisms: If you want height adjustability, the mechanism quality matters significantly. Crank actuator systems allow easy adjustment from ground level and are less likely to fail than mechanisms requiring tools or pole section removal. Look for systems that adjust in incremental settings and lock securely at each height. Cheap adjustment mechanisms fail frequently and can make your entire system unusable.
Rim quality and safety features: Breakaway rims flex under pressure and reduce stress on the backboard and mounting system. This feature also improves safety by reducing the impact when players make contact with the rim. Competition grade breakaway rims are designed to handle dunking and aggressive play that would damage fixed rims. Steel construction with weather-resistant coatings will outlast cheap painted rims that rust quickly in Mid-Atlantic weather conditions.
The Professional Installation Process for In-Ground Systems
Understanding the professional installation process helps you appreciate why proper installation requires specific expertise, equipment, and time. It also shows you what to expect if you hire qualified installers versus attempting DIY installation or hiring unqualified handymen.
Step One: Site Preparation and Excavation
Professional installers begin by verifying utility clearances and marking the exact installation location. Placement affects playing area layout, drainage patterns, and future accessibility for maintenance or removal.
The excavation process requires digging a hole that meets manufacturer specifications, typically 48 inches deep and 16 to 24 inches in diameter depending on your system size. Professional installers use appropriate equipment to excavate efficiently while maintaining straight walls and a level bottom. The hole depth must account for your local frost line and provide adequate concrete coverage around the anchor system.
Step Two: Anchor System Installation
Modern in-ground basketball systems use anchor kits rather than direct pole burial. This approach provides several advantages including the ability to relocate your system if you move, easier pole replacement if damage occurs, and more precise leveling capabilities during installation.
The anchor bolts or sleeve must be positioned precisely to ensure your pole stands perfectly plumb. Professional installers use specialized tools and laser levels to verify positioning before concrete curing begins. Even small deviations from plumb become obvious once your backboard is attached and can affect both appearance and play quality.
Step Three: Concrete Mixing and Pouring
Quality concrete work separates professional installations from amateur attempts. Installers use concrete that meets ASTM C387 specifications, which ensures adequate compressive strength for basketball system anchoring.
The concrete mixing process matters critically. Too much water weakens the concrete and extends curing time. Insufficient mixing leaves dry pockets that compromise strength. Professional installers mix concrete to proper consistency and pour it in stages, eliminating air pockets that reduce anchor holding power.
As concrete is poured, installers continually verify that anchor positioning remains correct. The concrete must fully surround all anchor components and extend to proper depth. The top surface should be finished slightly above grade with proper slope to direct water away from the pole base.
Step Four: Concrete Curing Period
Concrete reaches sufficient strength for pole installation after 72 hours in moderate temperatures, but full curing takes 28 days. Professional installers schedule pole and backboard assembly only after adequate curing time has elapsed.
Temperature and weather conditions during curing affect concrete strength development. Cold temperatures slow curing and may require extended wait times. Hot temperatures and direct sun can cause rapid surface drying that leads to cracking. Experienced installers protect fresh concrete appropriately and adjust curing schedules based on weather conditions.
Step Five: Pole and Backboard Assembly
With the anchor fully cured, installers proceed with pole installation, backboard attachment, and final adjustments. The pole must be installed at the correct height and orientation to ensure proper playing dimensions.
Backboard attachment requires following manufacturer torque specifications for all fasteners. Under-tightened connections can vibrate loose during play, while over-tightening can crack backboard mounting points or strip threads. Professional installers use torque wrenches and follow assembly sequences precisely to ensure safe, long-lasting connections.
Final leveling and adjustment ensure your rim sits at exactly 10 feet and the backboard faces squarely toward the playing area. These final adjustments require patience and precision that amateur installers often rush through or skip entirely.
Step Six: Safety Inspection and Testing
Professional installers conduct thorough safety inspections before considering a job complete. This includes verifying that all bolts are properly tightened, checking for any sharp edges or protrusions that could cause injuries, confirming proper clearances around the playing area, testing the adjustment mechanism if your system includes height adjustment, and ensuring the pole base is properly finished to prevent trip hazards.
Installers also provide homeowners with maintenance guidance, warranty information, and instructions for seasonal care that will extend system life and maintain safety.
Understanding Basketball System Specifications: A Focus on Quality Standards
When evaluating basketball systems, certain manufacturers have established reputations for quality construction and safety features that professionals trust. Understanding what separates premium systems from budget options helps you make informed purchasing decisions.
Goalrilla has built a strong reputation in the residential basketball market by focusing on systems engineered to handle aggressive play and deliver gym-quality performance at home. Their systems are widely used across Maryland, Virginia, Pennsylvania, and Delaware, with extensive dealer and installer networks throughout the Mid-Atlantic region.
Industry Standards and Safety Compliance
Beyond specific manufacturers, professional installers follow established safety standards and building codes that govern basketball system installations. While residential installations don't face the same regulatory requirements as commercial or institutional facilities, following recognized standards ensures safety and longevity.
The American Society for Testing and Materials publishes specifications for concrete used in various applications, including sports equipment anchoring. Professional installers use concrete that meets or exceeds these standards to ensure adequate strength and durability.
Consumer Product Safety Commission guidelines address equipment design, installation requirements, and safety features for recreational equipment including basketball systems. Professional installers stay informed about safety recalls and compliance issues that might affect the systems they install.
Why Professional Installation Protects Your Investment and Safety
The decision to hire professional installers versus attempting DIY installation or hiring unqualified help affects more than just convenience. It impacts safety, warranty coverage, long-term system performance, and your potential liability.
Safety and Injury Prevention
Improperly installed basketball systems create serious injury risks. Poles that aren't adequately anchored can tip during play, particularly if players hang on rims or if aggressive dunking creates impact loads that exceed the anchor's capacity. Children playing on unstable systems face the highest risk since they may not recognize warning signs of instability until catastrophic failure occurs.
Wall-mounted systems that aren't properly anchored to structural members can detach from walls during use. The weight of the backboard, rim, and pole combined with dynamic forces during play creates substantial loading that standard wall anchors cannot handle safely. Professional installers know how to locate structural members, select appropriate mounting hardware, and verify installation strength before allowing system use.
Professional installation also addresses less obvious safety considerations. Sharp edges, protruding bolts, and pinch points during adjustment can all cause injuries. Quality installers identify and correct these hazards before turning systems over to homeowners.
Warranty Protection and Manufacturer Requirements
Many basketball system manufacturers require professional installation to maintain warranty coverage on their systems. This requirement protects manufacturers from warranty claims that result from improper installation rather than product defects.
If you attempt DIY installation and later experience system failure, your warranty claim may be denied if the manufacturer can demonstrate that improper installation caused the failure. This can leave you facing replacement costs for expensive components or even complete system replacement.
Professional installers familiar with specific manufacturers' systems know the critical installation requirements that affect warranty coverage. They document their work and can provide verification that installation met manufacturer specifications if warranty questions arise later.
Time Investment and Hidden Costs
DIY basketball hoop installation often takes far longer than homeowners anticipate. Digging a 48-inch deep hole by hand requires significant physical effort and can take several hours for someone without proper tools. Mixing and pouring concrete in stages while maintaining proper anchor positioning challenges even experienced DIYers. Assembly and adjustment require patience, proper tools, and attention to detail that rush jobs compromise.
Many homeowners who attempt DIY installation eventually call professionals to correct problems or complete installations they cannot finish. At that point, you've invested your time and purchased materials while still facing professional installation costs to complete the job correctly.
Professional installers complete jobs efficiently because they have proper equipment, multiple experienced crew members, and established processes that minimize wasted time. They also carry insurance that protects you if unexpected issues arise during installation.
Liability Considerations
As a homeowner, you bear liability for injuries that occur on your property, including basketball-related injuries. If your basketball system causes injury because of improper installation, you may face substantial legal and financial consequences.
Homeowners insurance policies typically include personal liability coverage, but coverage may be denied or limited if injuries result from negligence such as improper equipment installation. Professional installation provides documentation that your system was installed correctly according to manufacturer specifications and industry standards, which supports your position if liability questions arise.
Professional installers also carry liability insurance that covers damage to your property or injuries that occur during installation. This protection doesn't extend to systems they didn't install, leaving DIY installers fully exposed to these risks.
Maintenance and Long-Term Care for Basketball Systems
Even professionally installed basketball systems require ongoing maintenance to ensure continued safety, performance, and longevity. Understanding maintenance requirements helps you protect your investment and avoid premature system failure.
Seasonal Maintenance Tasks
Mid-Atlantic weather subjects basketball systems to significant temperature swings, precipitation, and occasional severe weather. Seasonal maintenance addresses these environmental stressors.
Spring preparation: Inspect all connection points for looseness that may have developed during winter. Check the pole base for any signs of frost heave or settling that created lean. Verify that the backboard has no cracks or damage. Clean debris from rim and net attachment points.
Summer monitoring: Watch for signs of concrete anchor movement or pole lean during active use season. Tighten bolts and connections that vibration has loosened. Replace nets that have become damaged or worn.
Fall winterization: For portable systems, drain water from bases before freezing temperatures arrive. Inspect adjustment mechanisms and lubricate moving parts as recommended by the manufacturer. Check for rust or corrosion on metal components and address issues before winter weather accelerates deterioration.
Winter protection: Remove nets before heavy snow to prevent damage. After significant snow or ice accumulation, carefully remove buildup from backboards and rims to prevent stress on mounting hardware. Avoid hanging or pulling on rims when cold temperatures make plastic and metal components more brittle.
Common Issues and When to Call Professionals
Certain basketball system problems require professional intervention rather than homeowner repairs. Recognizing these situations helps you avoid making problems worse or creating safety hazards.
Pole lean: Any noticeable lean in an in-ground pole indicates serious anchor failure or soil movement. Do not continue using the system until professionals evaluate the problem. Attempting to straighten poles without addressing underlying anchor issues typically fails and can make matters worse.
Backboard damage: Cracks in glass or acrylic backboards compromise structural integrity and can lead to sudden failure during use. Professional replacement is required as backboards are not repairable in most cases.
Rim damage: Bent rims or failed breakaway mechanisms affect play and may indicate that mounting hardware has been compromised. Professionals can evaluate whether rim replacement is sufficient or if backboard mounting has been damaged.
Adjustment mechanism failure: If height adjustment systems fail or become difficult to operate, continuing to force them can break components. Professional repair or replacement prevents complete system failure.
Frequently Asked Questions About Basketball Hoop Systems
How do I choose between in-ground and portable basketball hoops for my Maryland home?
The decision comes down to your playing intensity, space constraints, and whether you plan to stay in your home long-term. In-ground systems provide superior stability and performance for serious players, teenagers, and adults who play aggressively. They're the best choice if you have adequate space and plan to stay in your home for several years. Portable systems work better for young children, casual play, rental properties, or situations where you may need to relocate the hoop. In the Maryland and Northern Virginia markets, most homeowners who invest in quality portable systems eventually wish they had chosen in-ground installation once their children get older and play becomes more intense.
What does professional basketball hoop installation cost in the DC metro area?
Professional installation for in-ground basketball systems in Maryland, DC, Northern Virginia, Delaware, and Pennsylvania typically ranges from $400 to $800 depending on site conditions, soil type, accessibility, and system complexity. This pricing includes excavation, concrete, anchor installation, curing time, and complete assembly. Wall-mounted systems may cost less for installation but often require structural reinforcement that increases total project cost. Portable system assembly typically costs $150 to $300 for professional setup. While these costs may seem significant, they protect your investment and ensure safety in ways that DIY installation often cannot match.
How deep does the concrete need to be for an in-ground basketball hoop?
Professional installations require holes that are 48 inches deep to provide adequate anchor stability and extend below the frost line for Maryland, DC, and Northern Virginia locations. The hole diameter ranges from 16 to 24 inches depending on your system size and manufacturer specifications. Larger, heavier systems with regulation-size backboards require wider holes and more concrete. The concrete must fully surround the anchor system and extend to proper depth to prevent frost heave and provide sufficient holding power against the forces generated during aggressive play.
Can I install a basketball hoop myself or should I hire professionals?
While manufacturers provide DIY installation instructions, professional installation offers significant advantages. Professionals have proper excavation equipment that makes digging faster and less physically demanding. They know how to properly mix and pour concrete to achieve adequate strength. Experienced installers can troubleshoot site-specific challenges like rocky soil, utility conflicts, or drainage issues. Most importantly, professional installation ensures proper anchor depth, concrete coverage, and plumb pole positioning that DIY installers often struggle to achieve. If your system requires professional installation to maintain warranty coverage, attempting DIY installation can cost you far more than you save if problems develop later.
What backboard size should I choose for a residential driveway?
Backboard selection depends on your available space and player ages. For single-car driveways, 54-inch backboards provide adequate playing area without overwhelming the space. Two-car driveways accommodate 60-inch backboards comfortably, offering better shot options and more authentic play. Three-car driveways or dedicated court areas can handle regulation 72-inch backboards that deliver the most realistic experience. Professional installers in Maryland and Northern Virginia generally recommend the largest backboard your space can accommodate because families rarely regret choosing larger backboards but frequently wish they had gone bigger after living with smaller systems.
How long does concrete need to cure before I can use my new basketball hoop?
Concrete requires a minimum of 72 hours to develop sufficient strength for pole installation and use, but full curing takes 28 days. Professional installers wait at least three days before completing assembly and allowing play. During the first month, avoid extremely aggressive play, dunking, or hanging on the rim as the concrete continues gaining strength. Temperature affects curing time, with cold weather requiring extended curing periods and hot weather requiring protection to prevent rapid drying and cracking. Following proper curing schedules ensures your anchor achieves full strength and will remain stable for decades.
What should I do if my basketball pole starts leaning?
Any noticeable pole lean indicates a serious problem that requires professional evaluation. Stop using the system immediately to prevent injuries or further damage. Do not attempt to straighten the pole yourself as this typically makes anchor problems worse. Professional installers can assess whether the lean results from concrete anchor failure, soil settlement, improper installation depth, or frost heave. In many cases, complete reinstallation with proper anchor depth and adequate concrete is necessary. Addressing pole lean quickly prevents catastrophic failure that could cause injuries.
Do basketball hoop installations require permits in Maryland or Virginia?
Residential basketball hoop installations typically do not require building permits in most Maryland, DC, Virginia, Delaware, and Pennsylvania jurisdictions. However, regulations vary by county and municipality. Professional installers familiar with your specific area know local requirements and can advise whether permits are necessary. Even when permits aren't required, you should still obtain utility locates before digging and follow manufacturer installation specifications. Homeowners associations may have additional requirements or restrictions that affect basketball hoop placement and design.
How do Maryland winters affect basketball hoop systems?
Mid-Atlantic winters create several challenges for basketball systems. Freezing and thawing cycles can cause frost heave in improperly installed anchors, pushing poles out of position. Snow and ice accumulation add weight to backboards and rims that can stress mounting hardware. Portable system bases filled with water must be drained before freezing to prevent cracking. Professional installation that places anchors below the frost line prevents most winter-related problems. Proper seasonal maintenance including removing nets before heavy snow and clearing ice accumulation from backboards helps systems survive winters without damage.